Ceramic tile is the most successful solution for flooring in the so-called wet zone, in other words, in the kitchen, in the bathroom or toilet, because there the probability of water getting on the decorative coating is quite high. In order to competently perform DIY laying tiles on the floor in an apartment or a private house, you need to familiarize yourself with the construction technology of installation, as well as learn the professional secrets of experienced craftsmen.
The first thing that the owners of the repaired building face is the purchase of decorative finishing materials (cladding, grouting) and related products. As for the design of tiles, here everyone relies on their own taste, but their purpose must be clarified, otherwise you risk acquiring material that can be laid exclusively on walls, despite the fact that you need floor tiles. The main differences between these two types of ceramic tiles are:
- thickness;
- coating texture;
- strength.
We draw your attention to the fact that products that are laid on the floor are equipped with a rough surface in order to avoid injuries when wet feet come into contact with the floor due to slipping. We also advise you to make the purchase of the required amount of cladding at a time from one consignment, otherwise you may encounter a difference in shade, and this will negatively affect the decorative effect.
The grout for joints is also selected according to the same principle. Currently, designers offer a lot of options for processing ceramic coatings, where the grout does not have to fall into the tone of the cladding - it can be contrasting.
Do not forget about a small supply of tiles, because in the process of work marriage may be found or several samples will crack during cutting, which often happens even with experienced craftsmen, not to mention those who make repairs themselves.
Preparing the floor for decoration
The quality of the work performed depends on the condition of the foundation, which means that the floor must be smooth and free from all kinds of contamination. Since the base in the kitchen or toilet can be made of various building materials, we suggest that you consider each option separately.
Cement strainer
In most cases, in a new building, laying of ceramic cladding is carried out on a concrete screed, and the main thing is to withstand the time after pouring it until the moment when it is possible to lay the tiles, which will take at least 30 days. This period is quite sufficient for the complete setting and hardening of the cement-sand mixture.
Do not forget that hardeners for mortar create a strong film on the floor, which reduces the adhesion of the substrate to the cladding. It is also necessary to know that the new house is shrinking technically, and the bearing framework may become cracked.
To avoid trouble when lining surfaces with your own hands, it is advisable to organize a plastic layer between the floor and decorative material, then tile and grout for joints will last you for more than a decade. Are you planning to put decorative cladding in the toilet or in the shower room in the old house, and the base there cracked with time? It is necessary to eliminate all existing defects with the help of special repair compounds. Any specialist will tell you with confidence that it is best to lay ceramic products on a concrete base, the main thing is not to forget to prime the subfloor.
Wooden floors
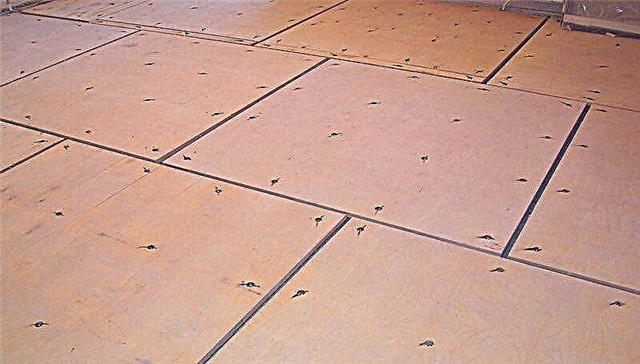
Very rarely you can find a perfectly even wooden flooring, so in most cases you will have to put plywood sheets or OSB boards on top of it with your own hands. Ideally, the thickness of the pressed chip or plywood substrate should be at least 12 mm, since it should safely withstand the pressure of the massive tile and not be deformed.
In bathrooms and toilets, it is better to give preference to elastic linings, because the tree is subject to intense swelling in a humid environment, which is why the lining on the floor can crack.
Old tile
Starting to install the floor covering, one often encounters a problem when it is not possible to remove the old tile without significant damage to the base, then you will have to dismantle it and refill the screed again, filling all voids and bumps with fresh mortar. Unfortunately, such a process will take a lot of time, and this is far from suitable for everyone.
You can also solve this problem in another way, namely, sanding the surface (grout for seams must be carefully removed) until a rough texture is formed.
Essential tool
When planning to put decorative tile material in the toilet or in the kitchen with your own hands, you need to prepare in advance the necessary devices with which the main process is carried out and grouting is performed.
To do this, you will need:
- glasses to protect the eyes from possible fragments;
- professional tile cutter;
- level;
- notched trowel;
- rubber spatula for joints;
- wide sponge;
- tape measure and slate pencil;
- plastic crosses of the required size;
- a hammer;
- clean rags.
At the time of collecting the tool, you need to determine the pattern, according to which the material will be laid on the floor. You can lay decorative material with your own hands exactly the seam in the seam, diagonally, in a run. Whether you want to limit yourself to a single-color tile, combine contrasting shades in a checkerboard pattern or add decor - it's up to you to decide the main thing is that the result is harmonious and delight with its beauty.
Professional advice
Typically, laying tiles on the floor in the bathroom, toilet or kitchen begins from the wall, which is always in sight, and it is better to leave trimmer in those areas where it is planned to install furniture and sanitary ware. Do not forget to control the axial lines of the window opening, because when you enter the room, the mismatch between the tile seams and those same lines is immediately evident and does not look aesthetically pleasing.
To avoid such errors, first lay out part of the ceramic cladding without gluing and make sure that the desired pattern is achieved. Such a procedure will not take much time, but as practice shows, it will be very useful.
Glue selection
On the shelves of building stores there are two types of adhesive for ceramic tiles:
- Ready glue.
- Dry mix for making the solution with your own hands.
The finished mass is poured into plastic buckets, and you can immediately start using it without additional preparation. The only drawback of this material is its high cost. Dry mixes can be considered more popular glue, which, in turn, are divided into several categories:
- Universal - designed for most cases.
- Reinforced - are used for laying large-sized heavy tiles and porcelain tiles.
- Basic - are applied on perfectly smooth surfaces without errors.
- For difficult surfaces - on them you can put material with a smooth texture (glass, metal).
The solution is prepared from dry mixtures according to the instructions indicated on the package. To do this, dry mass is poured into a container of water in the proportions recommended by the manufacturer. Grout for joints is prepared in the same way. We do not recommend immediately kneading a large amount of glue, as it quickly hardens, and you just do not have time to develop it.
The main stage of installing tiles on the floor
In order to lay the facing material without problems, it is necessary to ensure the correct temperature regime in the toilet or bathroom, where the work will be carried out. The optimum mark is +20 C. If this parameter turns out to be less, the drying time of the glue will increase, and at high rates the moisture from the solution will evaporate very quickly, which will negatively affect its strength.
Starting to lay the floor tiles in the toilet with your own hands, you need to take the spatula with the even side, put glue on it and apply the mixture to the floor at an acute angle, with some effort. This method will help the glue to penetrate into all the holes, and it will evenly spread over a flat surface.
Next, you need to go through the glue with the toothed side of the spatula, maintaining the same pressure angle, otherwise the furrows will have different heights, which means that the tile will lie unevenly. The optimum adhesive layer should be at least 3 mm.
Ceramic cladding is laid on the floor, starting from the intended wall. If this is your first time doing such work in a bathroom or toilet yourself, start with solid tiles, and fill in the gaps formed with chopped material. Each tile is tightly pressed to the surface greased with glue, so that the furrows are completely filled with a solution, and its excess from the seams is wiped with a rag.
So that the size of the seams between the decorative segments are the same, and the grout lies evenly in them, you need to install plastic crosses at the joints of the tiles. Make sure that in the process of work the line of joints is not shifted - it should be straight.
Trimming of ceramic cladding material is performed using a special tile cutter, but in the case of thin samples, you can do with a glass cutter or a scraper with a victorious tip. The edge of the tiles is carefully chipped off with sharp mites.
After 24 hours, grout for joints can be applied, which fills the gaps between the decorative coating. In construction stores, a multi-colored fugue is sold, and you can easily pick it up for your tile. The procedure for applying the fugue is quite simple and is carried out with a rubber spatula.
After the material dries, the floor surface is wiped with a damp cloth. To grout last longer and not lose its color, it can be coated with a special solution. Following our advice, you can independently lay the tile on the floor in the toilet or shower.