Unlike starting leveling layers, the application of finishing putty for painting will ensure absolutely even walls and ceiling without any noticeable defects. This stage is vital before painting, pasting thin wallpaper, silk-screen printing and fabric coatings, because in all these cases, a thin layer of decor is not able to hide the existing flaws, which will subsequently be clearly visible.
Finishing Putty Selection
Manufacturers and sellers of building mixtures offer a large number of putty materials designed for use in various conditions. Only a correctly selected composition is able to provide high quality finishes and improve the technical characteristics of the decorative coating.
A good putty is a finely divided white compound that does not form lumps and is easily applied to the surface with a spatula. After drying, it should be firmly held on the wall and not crack. Material Consumption: 0.5 to 1 kg per m2. At the same time, masters recommend using the starting and finishing compositions of the same brand for decoration.
It is very difficult to give an unequivocal answer to the question of which putty is better, since different mixtures are required for rooms with different humidity and temperature extremes. If you have doubts about the right choice, buy a small trial package of the dry mix or a ready-to-apply solution.
Differences in composition
The material of the adhesive base putty can be gypsum, cement or acrylic polymers. It is the basic composition of the mixture that determines the area of its possible application for different operating conditions of the finishing coating after the repair is completed.
Gypsum. Plaster finishing putties are environmentally friendly, do not shrink, quickly set, form a beautiful matte white surface. These qualities and affordable cost make this option the most popular among finishers.
The main disadvantage is the increased sensitivity to moisture. As a result, the use of gypsum is limited only to dry heated rooms and is unacceptable with high humidity.
Cement mixes.
Cement-based putties are slightly susceptible to moisture and temperature extremes. The setting time is much longer than that of gypsum, which allows, if necessary, to correct the mistakes made.
The main disadvantage is the presence of shrinkage during setting and the possible formation of cracks. In addition, most cement materials have a gray tint, which can lead to the need for additional layers when painting.
Polymer.
Finishing fillers based on polymers, like gypsum, can only be used in dry, heated rooms, but the time for their full setting is longer and ranges from 1 to 3 days. They are highly elastic and can be applied to the surface with a thin layer of 0.2 mm. Provides high-quality finish, allowing you to abandon the final painting. The main disadvantage is the high cost.
Special additives.
To improve the quality of the putty surface, polypropylene fibers for disperse reinforcement are added to the mixtures. As a result, the strength increases, and the wall acquires a beautiful silky surface.
Types of coating material
When choosing a putty, it is necessary to take into account the material of walls, partitions and ceilings. So, for leveling concrete and cement plaster, the composition “Knauf HP finish” is recommended. Processing of gypsum plasterboard and gypsum fiber sheet is better to take "Veronit LR +".
Unius Premium is a universal putty and is suitable for any room. Manufacturer's recommendations for the use of the material are usually indicated on the packaging.
By type of further finishing
The next step after finishing putty may include:
- painting;
- Wallpapering;
- silk screen printing;
- upholstery;
- panoramic pasting.
All of these species have a small thickness and, as a result, any defects on the surface will become noticeable. To avoid this, dry finely dispersed compositions or ready-to-use mixtures should be selected for finish leveling.
According to the purpose of the premises
The technical characteristics of the putty rooms should take into account air humidity and possible temperature differences, which can lead to moisture condensation. Bathroom, kitchen, shower, toilet, loggia, porch and balcony are defined as rooms with high humidity. Therefore, they should not use gypsum and polymer putties. The best material in this case is cement-based fillers such as Ceresit, Sitek and Knauf.
Dry and cooked formulations
Ready-to-use putties are of high quality and comfortable. Factory mixing of the components allows you to get the optimal ratio between dry materials and water. As a result, the finished mixtures are highly ductile and can be applied in a very thin layer. However, their cost is 3-5 times higher than that of dry formulations.
The difference in the processing of the ceiling and walls
A feature of puttying ceilings is the application of a thinner layer of material on the horizontal surface of a flat slab. The mixture for the ceiling should be white to obtain high-quality paint.
In the bathroom and in the kitchen, gypsum compositions are not recommended. The requirements for the material for the walls include the possibility of double surface treatment with subsequent grinding, processing of corners and places of abutment to the ceiling.
Popular manufacturers
Among the optimal compositions for the price and quality, we can recommend finishing putties of the following brands:
- «Knauf HP Finish"- for coating concrete, drywall, cement plaster, plastic, drying time from 15 to 20 hours;
- «BETONIT LR +"- on gypsum plaster and gypsum-fiber sheets, as well as on concrete monoliths. Recommended for dry heated rooms. It takes about a day;
- «WEBER LR +"Lays down with a layer of 5 mm, freezes in 48 hours, delivered in paper bags of 25 kg.
Mixtures are recommended for the final processing of walls before painting and gluing thin wallpaper.
Materials and tools
To perform puttying, you will need:
- mixer nozzle for mixing dry mixes;
- three spatulas of various widths and one for processing corners;
- plaster rule and bubble level;
- buckets or other containers of 10-20 liters;
- grout for grouting;
- brushes for applying soil.
It is necessary to purchase a dry mixture of materials or a ready-to-use finishing putty. Plaster abrasive mesh. Deep penetration soil.
Calculation of the amount of putty
The flow rate of the mixture varies and depends on factors such as:
- coating thickness;
- composition of components;
- trade brand;
- readiness for use;
- wall material.
For example, consider the calculation of the consumption of dry Ceresit 225 CT made on the basis of cement. The required amount declared by the manufacturer is 1.8 kg / m2. Knowing these indicators, you can calculate the consumption by the area of the treated surface. But first, using the level and rules, you should check the quality of the preparation of the wall for defects.
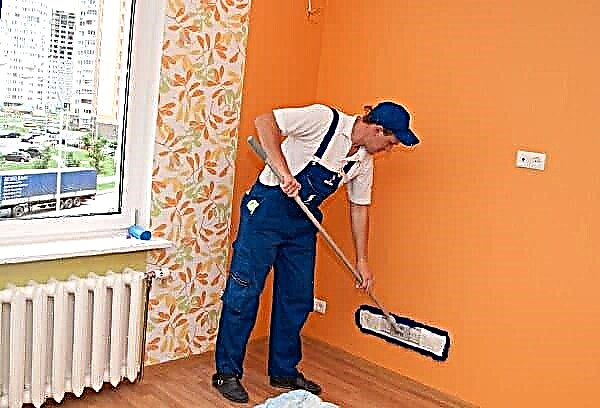
Preparatory work
Before filling the walls with finishing putty, the surface should be treated mechanically, smoothing out rough bumps and defects. After this, the wall must be primed. This will strengthen the surface layers, reduce moisture absorption and provide better adhesion.
If you use a dry mixture to prepare a solution, mix it with water, as indicated in the instructions on the package (we wrote more about kneading putty here). Now you can begin to putty.
Technology for applying putty
The putty process is carried out by four spatulas:
- large, for stretching the composition along the main surface;
- medium, for work in confined spaces;
- small, for applying mortar to working spatulas;
- angled for appropriate machining.
Flat spatulas with the mixture laid are pressed against the wall at an angle of 20-30 ° and move along the wall from bottom to top, leaving a thin layer of material on the surface. The remaining strips are easily leveled with a stucco grater. We already wrote about the puttying of corners here, and you can read more about the technology of puttying walls in this article.
10-12 hours after applying the putty, grout the surface with abrasive materials (again, an expanded description of this topic is set out here).
After this, prime.